
Slow felting and bag making days ahead 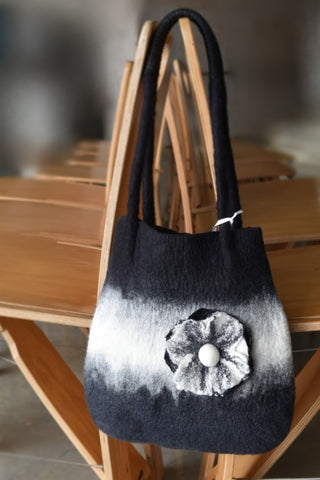
I have just started laying out and felting this years larger carry bag range and the first one is a black and white shoulder bags with a matching flower on the front.  The handles are made up first and firmed up before being put aside until the base is completed. I will lay out about 6 layers on each side of the base. I put the first side down and then placed the pocket on it and prefelted the pocket area and pocket edge. This will make sure it stays in place while the main work is done and the whole thing is rolled and thrown about. If the pocket has not been prefelted into place first (yep that means working form the inside out) it can move about and when you have finished you lovely felted bag, the pocket can be off centre and the opening might be askew a lot! Trust me I know this from experience!
Within the 6 layers I will have a piece of hand dyed matching mulberry silk fabric. This will be felted between the layers to add structural integrity and strength to the bag and will not be seen. After all we don't want to fill it up and then find out it doesn't hold weight. I will also mount and prefelt the handles within the 6 layers. This way you don't have the messy attachments which can be untidy on the outer layers. After all of this I will position and securely attach any closures that might be required.
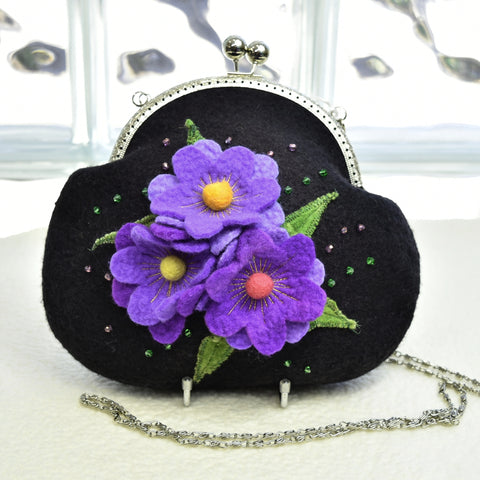
All of this layering, wetting out and more layering work is completed before I start to work on the outside decorative elements of the bag. That's where the fun part starts. Although I usually sketch my designs out before I start a larger felted bag sometimes I have a clear idea and just go for it! Some base colours will guide you in what they want regarding colours etc and some will just make you work and think a lot harder than you should to get them to look just perfect. I made a pretty raspberry hand bag last year and was really happy with how it felted and the finish was very good, but I had a hard time pick the perfect colours for the flowers to go with it. Every time I walked past I put a coloured piece of felt on it to see what it looked like, but nope... It just wouldn't work. It took about 4 months for me to drop a piece of charcoal felt on it I had in my hand for another piece. Then when I looked at it.. That was it! I stopped what I was doing and made the flowers and stitched them on before the bag had a chance to change its mind! And yes, I think some of them have a mind of their own at times!
I am a slow wet felter and take my time creating each bag. It can take me most of the day to lay out the 6 layers, they are made up of 6 layers on each side then edges attended to and the whole thing flipped over for the other side to be worked on, or 12 single sides all together. Add in some time for the handles, the flowers and any other design details that need to be considered and I have drunk a lot of coffee (decaff) before I know it.
And that's all before I actually start the rolling process or the fulling. This is usually carried out the next day. Rolling very gently to start with and don't rush it, slow and steady watching, rolling, checking, rotating and tweaking as I go, eventually I will see and feel it start to change and then I can work it a little harder. Finally after a huge amount of rolling and checking I can take out the resist and start working it again with my hands alone.
When it starts to feel like a bag. soft but strong, flexible and durable, it is eventually being shaped and crafted into the bag it will finally become.
Rinsing and drying is also a slow process, I soak first then rinse a number of times to remove all the soap. Finally shaping how it wants to be shaped and leaving it to dry slowly on it own.